Lime based thermal plaster part 2
This is a short blog experimenting with applying a known thermal lime plaster product internally. It is a 2 part article, the first of which can be found under Lime based thermal plaster part 1.
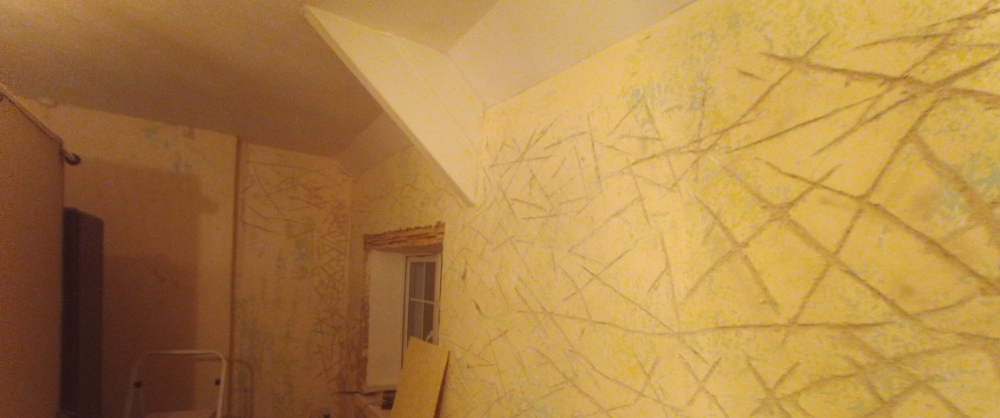
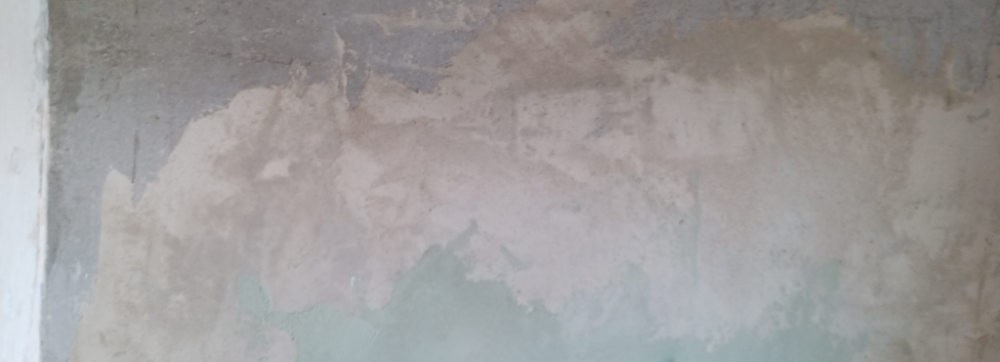
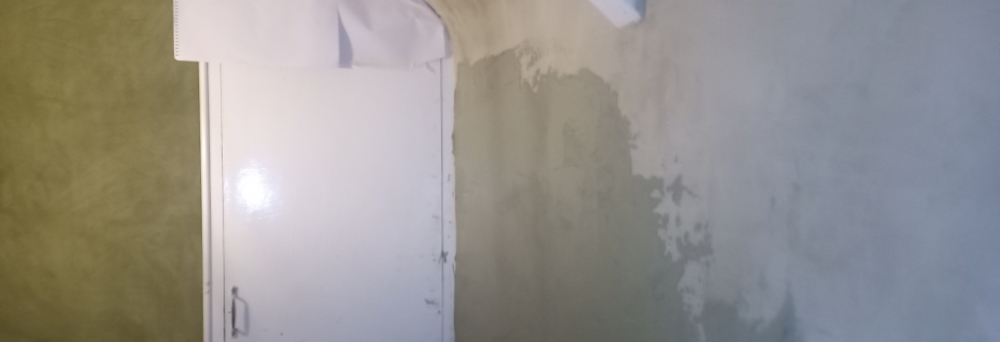
As explained in part 1, the advice initially was to take the plaster off at least internally but as time and cost wouldn't allow the project progressed as per the, essentially un-specified plan. So stage 1 was to remove all of the existing wallpaper and then inspect the surface, which was it was a mix of layers of dry glue, years of magnolia paint, older green paint, on top of primarily lime plaster with various patches of gypsum. The issue with this, being that any breathability of the wall had essentially been lost through the historical renovation layers, I to some extent questioned to overall breathability of a granite stone wall, except through the lime mortar connections.
So the intention was to score through this build up as deep and as much as possible, as well as remove the gypsum plaster where ever possible. Essentially cutting through this layer was, in the absence of being able to remove it completely the minimum recommendation from the manufacturer. So I start scoring with a chisel, and slowly moved to an electric tool I had, to create cuts around 5-10mm deep, primarily on the inside face of the external walls but also the faces of the internal solid supporting walls. It is worth noting, as an observation of the difference between gypsum plaster and lime plaster, that where there were sections of gypsum, they were very hard and noticeably damper. They were very hard to remove and would come off as large pieces, taking much of the lime with them, leaving a darker, damper area of wall below, an indication of the difference between the lime and the gypsum's hygroscopicity.
Then the next stage was to build the sort of extra rafters to allow for secondary insulation, which meant investigations in the loft to measure where the ceiling joists and the rafters lay, so as to be able to fix the new timbers to these from the underside. As there would be some weight hanging from these timbers, it was important to make sure they were strong enough, with a framework of timber to timber fixings, pack with mineral wool insulation between, thus the upper plater board layer, with the original plastic sheet on the outside, effectively becoming the moisture barrier, with the ventilation gap above and then the roof slates, below the existing plasterboard becoming the new improved thermal line of the envelope.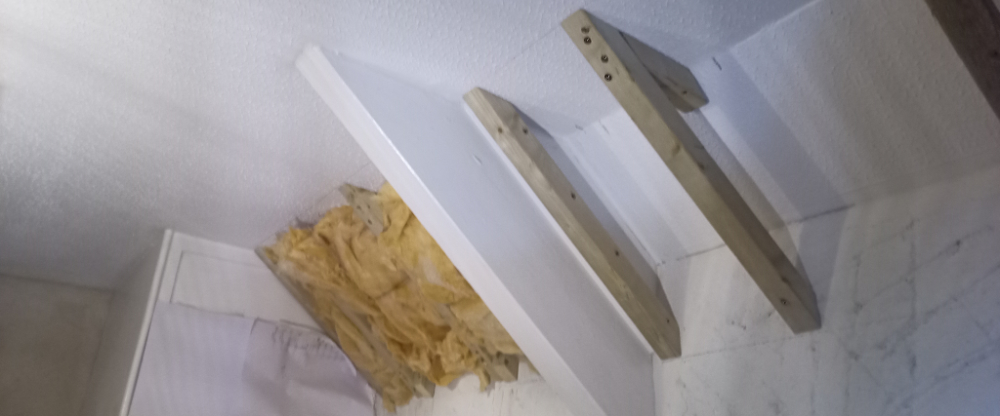
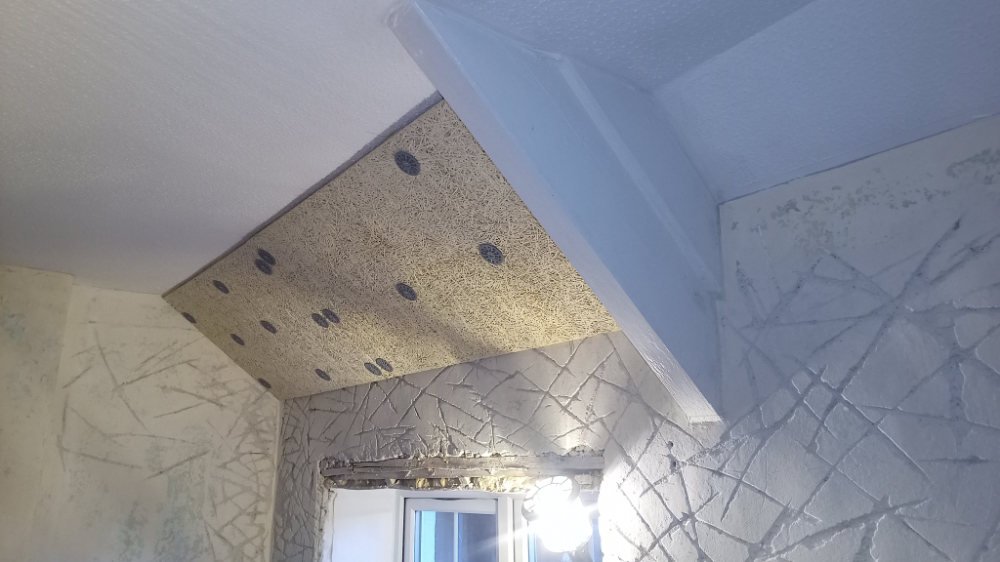
Once packed with mineral wool, the wood-wool boards (which are strands of timber compressed with a lime solution to make the hard, breathable and lightweight board) were then fixed to the new timbers. This installation required special plastic washers, to prevent the fixings from driving straight through the board, these lugs or washers hold it in place.
The back of the secondary framing filled with mineral wool, as the boards were fixed over to create the extra insulation line. All of the walls, and deep into the cuts being primed with an appropriate lime primer.
Left to dry, a plastic gauze mesh sheet which gives extra grip, and prevents cracking as the different substrates (the board and the scratched wall) move and dry at different rates, was then fixed.
It was laid from the top of the boards down the face and some way onto the walls below. This was quite fiddly, and partly fixed with the washers, though the better way may have been to lay a thin first coat of plaster and then press the gauze into this to hold iit until a second coat is applied.
Next stage was to use the thermal insulation applied to the lower walls, and then up to the boards. But it came to the angle boards, the thermal product felt very gritty as if it wasn’t taking to the board correctly. A test was carried out using the finish plaster but this seemed to be too thin as it dried and allowed the washer rings to show through the plaster. So after double checking with the manufacturers and taking advice, extra bags of the hemp shiv product were bought to apply to the upper boards to build it up, and blend down to the thermal plaster below.
This is one of the advantages of this manufacturer and the product range, which is essentially three products, in a similar way to some gypsum manufacturers have, a bonding coat and a finish coat. This makes the use of lime in some ways more familiar to the general builders market, rather than only to a specialist lime specialist market. There is the hemp shiv coat, which is similar to what one might call a bonding coat in gypsum plaster, the thicker mineral added thermal coat and then the final, finer and thinner finish coat of plaster. The application per pass being thickest with the thermal coat, around 10-15mm and thinnest with the finish coat, between 3-6mm and the bond cost between 5 and 10mm.
Despite having worked with gypsum plaster, there was quite a lot of trepidation about using lime, but actually these products seemed to work in a very similar way. The product initially hardened relatively quickly, despite the moist weather conditions, and water could always be added, to the mix of hardening too quickly, unlike gypsum, which has a point at which it can becomes too lumpy to apply. The use of lime does though, come with an extreme warning, was reinforced the hard way. Having bought water proof gloves, it was discovered that the rear side of these were actually not rubber but textile, which at some point got wet, seeped into the gloves and caused mild burns. A brief pause to check and buy fully rubber gloves, front and back solved this issue, and don't forget goggles and cover all skin, where possible, chemical burns are at minimum not pleasant and worst very dangerous!
Application of the thermal plaster was around 10-15mm at a time, and between 2 and three coats, though this was obviously thicker where it curved across at the angles with the pitched boards and in the corners which (also helpful because these are effectively the weakest points from a thermal perspective). This was also helped by the nature of the finish and the building being worked on which was a homely, rustic, feel, so curved rather than pristine orthogonal lines and square corners, though no doubt the product could do both, this would just a matter of the skill level in application.
So with about 25-30 mill of thermal insulation plaster on the external walls and around or 10-15mm of hemp Shiv plaster on the boards and a kind of mix of both at the horizontal curves. The window was very difficult to finish neatly.
In hindsight too much time was spent trying to get a perfect first coat, where as the first coats can be quite rough, with the differences picked up with the finish coats. Around 28 bags of plaster, were used around 4 of which were finish, 8 hemp shiv or bonding coat and the rest thermal plaster. The amounts calculated using the square metreage and the manufacturers guidance, which was about right, if maybe slightly short, due to lack of experience in plastering and a certain amount landing on the floor ! The internals walls, which were not exposed to the elements externally received only the lime primer, hemp shiv and finish coat of plaster.
The skirting boards had been removed at the start and because of the increased thickness had to be cut down, as the finish cured, which it did quicker than expected, despite the thickness. However, guidance suggested continually wetting the surface, so as not to dry too quickly and waiting a number of days before overpainting (with a breathable paint). Time was extremely short and with guests due to come by the end of the week, despite using a dehumidifier also, it wasn't going to be possible to over paint.
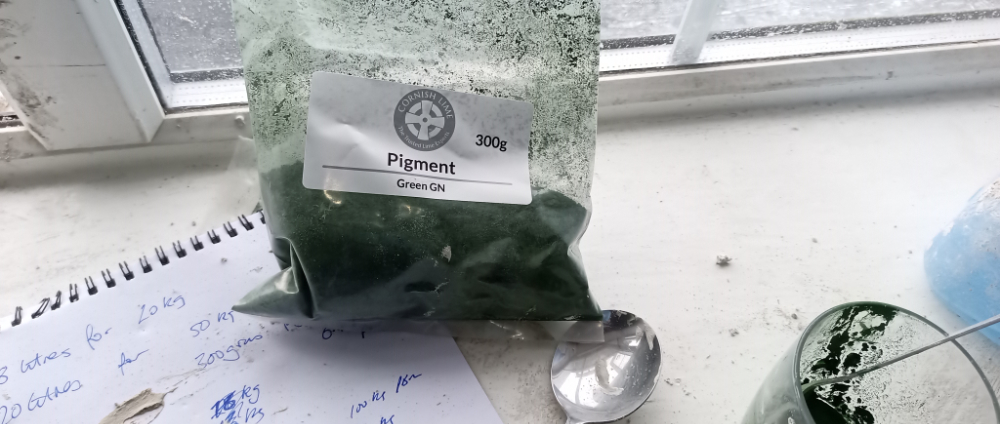
So the last and final part, in the circumstances, essentially running out of time, another choice was made, again one not fully recommended by the supplier. That was to use a pigment in the final coat of the lime plaster, to avoid leaving a pink / grey patchy wall for the next guests.
The use of pigment, also from a different manufacturer, essentially introduced a significant unknown element for the lime plaster supplier and thus totally reasonable for them to advise against it, but I was running out of time and needs must as the devil drives. So testing with the pigment began.
Initially less than a teaspoon full of pigment, mixed with warm water was added to a small bucket of finish lime plaster mix, plastered on parts of the wall, to see what the colour was. It was a guessing game really, in the end using around 4 heaped teaspoonfuls per packet of plaster, first prepared with warm water to dissolve the pigment, added to the mixing bucket and mixed, then applied and hoped for the best.
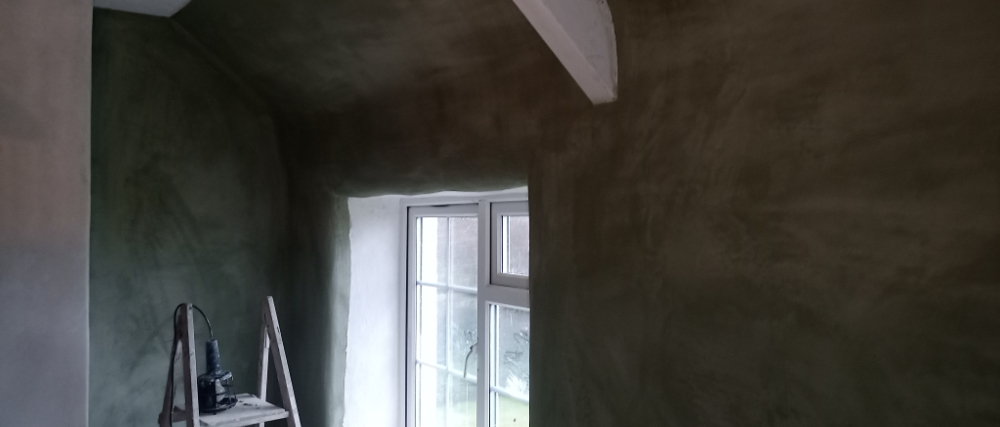
Having spent quite some time trying to get neatly applied plaster lines in most areas, it was a struggle around the window opening, because of the uneven surface. So rightly or wrongly, a sponge finish seemed the only way to get some form of smooth even finish. This was possibly done too early, out of a desperation to get finished, which meant leaving a somewhat gritty rather than smooth surface, but once the sponge had started to be used, there wasn't really a going back. A lot of questioning over the darkness of the surface, the finish of the surface being unsure how it would look, mainly because of the sponging but also the pigment, hoping because of the rustic feel, it might just fit.
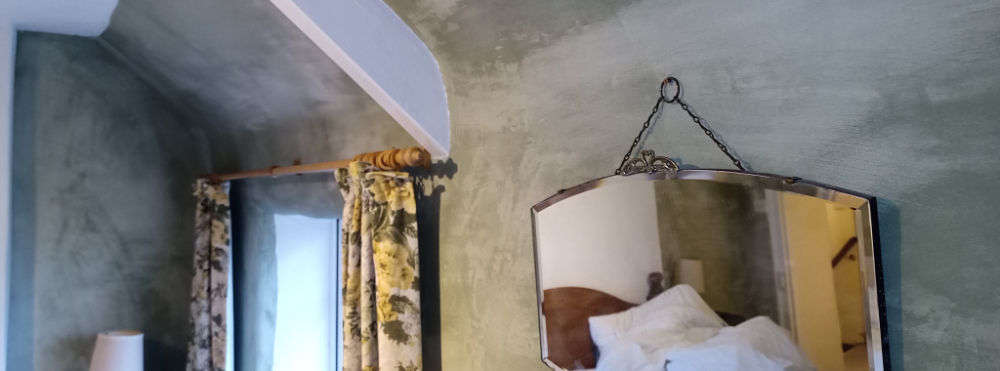
By the time it came to leave it was what it was, and felt quite dark, but visiting some 6 months later and from the feedback of guests, it was a different, but charming finish, that we have come to be fond of. Most importantly the combination of improved, loft insulation, eaves insulation and the thermal plaster, have dramatically improved the temperature of the wall and the ability of the space to retain its heat.
So all in all, as a DIY project, though challenging, it was deemed a success and a good fit for that 16th Century cottage.
[edit] Related articles on Designing Buildings
- Binding agent.
- Cement mortar.
- Defects in brickwork.
- Defects in stonework.
- Dry hydrate lime mortar.
- Grout.
- Gypsum.
- Harl.
- Hemp lime construction: A guide to building with hemp lime composites.
- High alumina cement.
- High lime low alkali glass.
- Hot-mixed lime mortar.
- Hot-mixed mortars: the new lime revival.
- Hydraulic lime.
- Hydrated lime.
- Lime based thermal plaster part 1.
- Lime concrete.
- Lime mortar.
- Lime mortars vs. cement.
- Lime plaster.
- Lime putty mortar.
- Lime run-off.
- Mortar.
- Mortar analysis for specifiers.
- Non hydraulic lime.
- Pointing.
- Portland cement.
- Rendering.
- Soda-lime glass.
- Stucco.
- Types of mortar.
- The use of lime mortar in building conservation.
- Types of mortar.
Featured articles and news
Exchange for Change for UK deposit return scheme
The UK Deposit Management Organisation established to deliver Deposit Return Scheme unveils trading name.
A guide to integrating heat pumps
As the Future Homes Standard approaches Future Homes Hub publishes hints and tips for Architects and Architectural Technologists.
BSR as a standalone body; statements, key roles, context
Statements from key figures in key and changing roles.
ECA launches Welsh Election Manifesto
ECA calls on political parties 100 day milestone to the Senedd elections.
Resident engagement as the key to successful retrofits
Retrofit is about people, not just buildings, from early starts to beyond handover.
Plastic, recycling and its symbol
Student competition winning, M.C.Esher inspired Möbius strip design symbolising continuity within a finite entity.
Do you take the lead in a circular construction economy?
Help us develop and expand this wiki as a resource for academia and industry alike.
Warm Homes Plan Workforce Taskforce
Risks of undermining UK’s energy transition due to lack of electrotechnical industry representation, says ECA.
Cost Optimal Domestic Electrification CODE
Modelling retrofits only on costs that directly impact the consumer: upfront cost of equipment, energy costs and maintenance costs.
The Warm Homes Plan details released
What's new and what is not, with industry reactions.
Could AI and VR cause an increase the value of heritage?
The Orange book: 2026 Amendment 4 to BS 7671:2018
ECA welcomes IET and BSI content sign off.
How neural technologies could transform the design future
Enhancing legacy parametric engines, offering novel ways to explore solutions and generate geometry.
Key AI related terms to be aware of
With explanations from the UK government and other bodies.
From QS to further education teacher
Applying real world skills with the next generation.


